Some of the data I’ve noted from the AMTMA studies make it very clear that measurement disputes will continue. When the range of readings is close to or exceeds the tolerances of the gages being calibrated, it is a certainty. Further problems will occur due to unrealistic expectations by all the parties involved in a dispute.
A host of tools are available to metrologists in today’s manufacturing environment. Many are simple, mechanical, and accessible to anyone who wants to measure something.
The American Measuring Tool Manufacturers Association (AMTMA) is an organization whose members manufacture, supply, and/or calibrate precision gages and measuring instruments. If you use this type of equipment, the odds are it came from one or more AMTMA member companies.
Readers of this column will be familiar with the subject of measurement uncertainty since I comment on it from time to time, as I did last month. Those readers that have not been that interested in it will certainly run across it on reports from their calibration sources.
The American Society of Mechanical Engineers (ASME) has published a new standard that identifies elements that will impact measurement uncertainty from thread calibration processes.
Readers of this column are a gentle lot and not likely to run afoul of criminal law but can end up in a similarly frustrating situation that limits their working life.
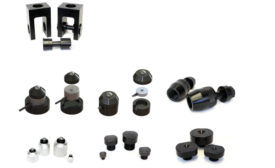
Not using the proper adapters to calibrate load cells, truck and aircraft scales, tension links, dynamometers, and other force measuring devices can produce significant measurement errors and pose serious safety concerns.
This is an area of gage making that takes something simple like a go/nogo plain plug gage and adds another feature for another check, such as hole depth.
This question would seem to be an easy one to answer but—like too many things in life—nothing is simple anymore. This is due to the absence of standardized rules on which to base the decision which will vary from one organization to another.