Sometimes all the usual steps taken to resolve measurement disputes still don’t point to a culprit you can deal with. But one certainty always remains: Your customer insists their gages are right so the problem must be due to your gages.
The purchase of Trace 1 Calibrations further increases J.A. King’s market share in Oklahoma. J.A. King currently has a full-service lab located in Oklahoma City.
We frequently calibrate gages and instruments in the dimensional field for labs that primarily deal with electronic or other disciplines. This occurs when their customers try to cut corners by adding one or more dimensional items onto an order they have received for their normal work.
Too often users of precision measuring instruments and gages end up with the wrong equipment and don’t find out until it’s too late. ‘Too late’ means after rejects are detected by in-house measurements or in worst case scenarios, by their customer.
In an age where, if it doesn’t have a digital display it’s not modern, we tend to forget how the levels of precision we measure to came about in the first place. This is a brief look at one of the people we are indebted to for their discoveries and inventions from many years ago.
While process improvement initiatives, including SPC and its use of control charts, sometimes get the greatest attention in manufacturing environments, the backbone of a quality improvement effort is often the quiet, unnoticed measurement devices that represent an organization’s commitment to consistency and accuracy.
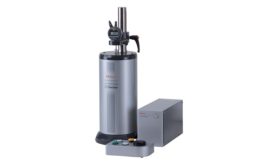
Mitutoyo America Corporation announces the release of the i-Checker, an inspection instrument specially designed to calibrate a variety of indicators, including bore gages, Digimatic indicators, dial indicators, dial test indicators and linear gages.