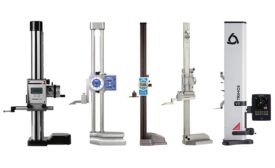
The height gage has transformed. From its infancy to today, the height gage has been in the grittiest shop environments. In spite of that, height gages also have the ability to meet the quality measurement demands of any precision laboratory. Regardless of how they are used or where, height gages have stood the test of time and remain an essential tool in every workshop.
The Master3DGage development team announced the all new, third generation, Master3DGage – the affordable and portable rapid 3D inspection and reverse engineering solution that enables machine shops to increase efficiency, improve part quality, and reduce scrap.
This question would seem to be an easy one to answer but—like too many things in life—nothing is simple anymore. This is due to the absence of standardized rules on which to base the decision which will vary from one organization to another.
I am in my tenth year as a part-time instructor at Western Michigan University, currently working with junior- and senior-level engineering students. I instruct the hands-on metrology lab of Dr. Pavel Ikonomov’s metrology class. We have about 15 weeks for this three-credit hour class to introduce metrology, focusing on precision measurement. We have about 45 students taking three hours of lecture and three hours of lab each week.
I have received a couple of emails from readers recently concerning what does or does not have to be calibrated within a quality system. In both cases, the companies already have a program in place to ensure their measuring equipment, masters, etc., are calibrated on a regular basis but an odd item has popped up leading to debate within the company on whether that odd item has to be included in their calibration program as well.
There’s no question about this column. I accept the blame for what appears in this monthly effort for better or worse. This column is all about the standards I often refer to in my rants. I frequently encounter folks who question the information these standards contain and sometimes the question is valid but there are ways to challenge or change technical details within them.
You’ve made the threaded parts and are confident they are okay because you’ve checked them with your gages. Then you get the call from the customer advising you that their gages have rejected the parts and they are demanding re-work or replacements ASAP.
In recent columns I’ve commented on information requests accompanying calibration orders. Some of these are common and effective but some are not. Occasionally, they are brought about due to their inclusion in one standard or another but are misrepresented. In some cases, the standard they are from relates to in-house systems rather than calibration activities by outside parties.
If you want to get technical, this topic is better dealt with by others since it is a quality matter rather than dimensional metrology where I hide out. But, disputes go on every day over measurements and sometimes resolving them can be quite challenging—when possible.